Shopify with the CodesWholesale plugin allows you to easily integrate your store with Facebook and reach your clients where they spend over 30% of their online time. Read this quick instruction to find out how to set up your Facebook store!
First, you’re going to need these three things:
– Your own Shopify-based store (first 14 days are free)
– Free CodesWholesale plugin for Shopify
– Your store’s Facebook page
If you don’t have a Shopify store with the CodesWholesale plugin yet, follow this instruction to setup and configure it.
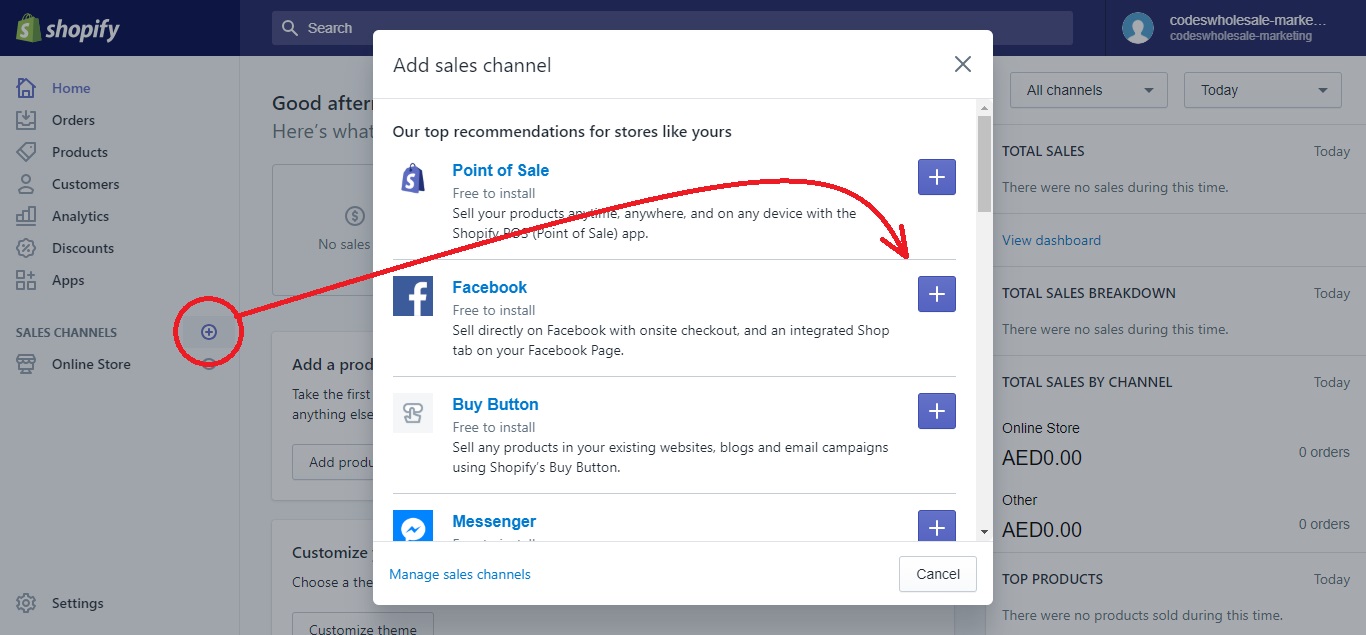
If your store is ready and you’ve imported the selected products, it’s time to create a Facebook sales channel. To do that, log in to your Shopify admin, click [+] next to “sales channels” on your left, and pick Facebook from the list.
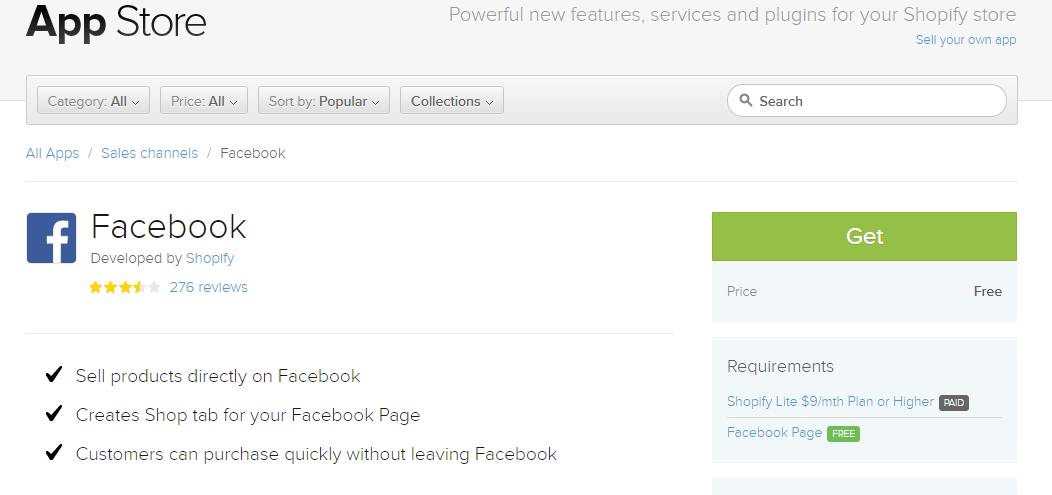
You’ll be redirected to Shopify App Store. Here you can get a Facebook app.
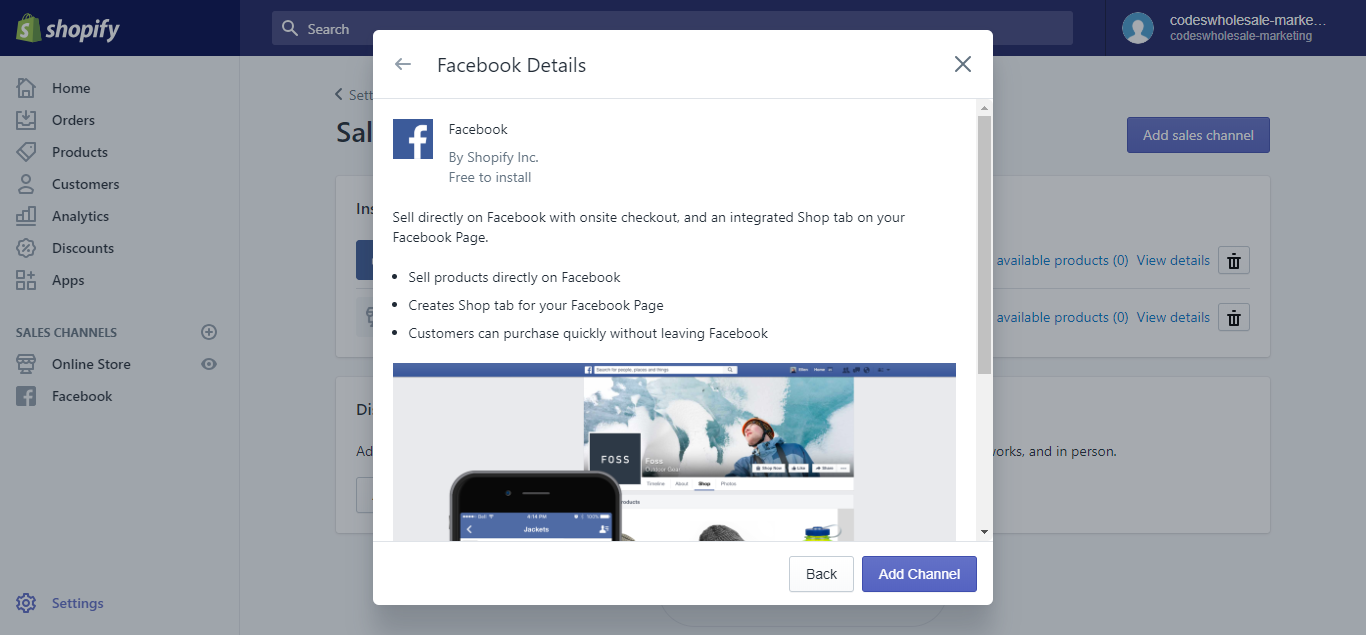
After installation, Facebook will appear in your admin under Sales channels. Click on it to see the configuration options.
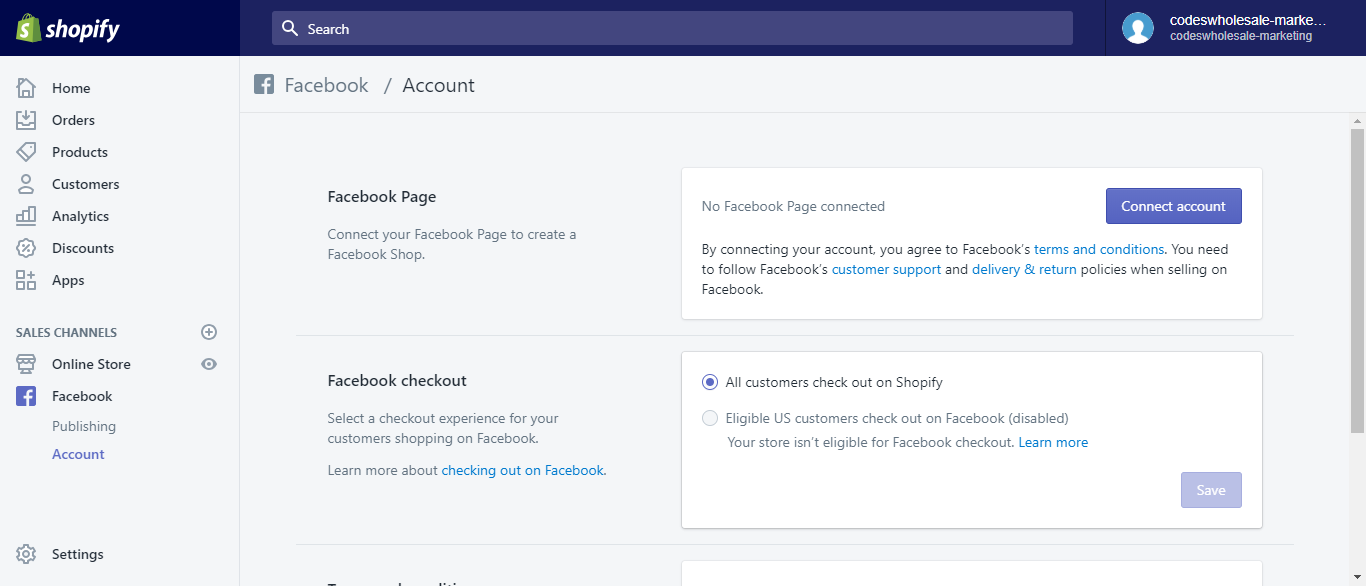
In the Account tab, you can connect your Facebook page to the store, enable Facebook checkout (it’s possible only if you sell in a currency supported by Facebook), and read Facebook’s Terms and Conditions.
After configuration, you’ll need to wait for Facebook to review your store.
When Facebook gives you the go-ahead, publish chosen products from your store on your Facebook page.
About the author

- Content specialist and gaming enthusiast. Trained to be a philosopher. Interested in Deep Learning, scalability and startups.
Latest entries
